It doesn’t matter how great your microphone is, if you don’t use it properly, then your results will fall short of your expectations. Here at Sweetwater, we’ve used just about every mic on the planet in multiple applications. Through trial and error (and a bit of good old-fashioned know-how), we’ve learned what works and what doesn’t. Here are some tips to help you get the most out of your mics.
Use the Right Microphone for Your Source and Application
 We’re often asked, “What’s the best microphone?” But the real question is, “What’s the best microphone for your specific application?” Every source is different, and this is especially true when tracking vocals.
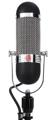
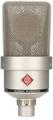
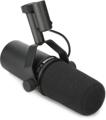
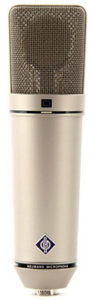
In the world of microphones, opposites attract. A singer with a dark voice often pairs well with a brighter mic, typically a large-diaphragm condenser like the AKG C414 XLII or Neumann TLM 103. A vocalist with a brash-sounding voice, however, may pair better with a darker mic like the Telefunken U47, or even a ribbon like the Royer R-121 or AEA R-84. If you have a quiet, sultry vocalist, a large-diaphragm tube condenser, like a Neumann M 149, will bring out the “smokiness” in their voice. A screaming hard-core singer, on the other hand, needs a microphone that will handle lots of level and is more resilient, such as a Shure SM7B or Electro-Voice RE20 dynamic mic.
Vocals aren’t the only thing you’re recording, of course, but the principles remain the same. Pair brighter sources with darker mics and darker sources with brighter mics. Quiet sources, such as delicate acoustic instruments, need sensitive mics, while louder sources, like cranked guitar amplifiers, need a microphone with sufficient SPL handling to accommodate the high volume.
You also have to be cognizant of your application. For pop vocals, a modern-sounding large-diaphragm condenser like the Mojave Audio MA-200 is a near-universal choice. The pronounced high end on this type of mic does a great job of cutting through a dense mix and throbbing dance beat. For rock, a vintage-sounding large-diaphragm condenser like the Neumann U 87 Ai is a great choice. But for a classic rock-type vibe, you can’t beat the punch of a dynamic mic like the Shure SM57 and the Sennheiser MD 441U. These mics fuse a hard-rocking vocal with pounding drums and roaring guitars in a powerful way.
Use Correct Mic Positioning
Correct microphone positioning is vital to a pro-sounding recording. It’s the engineer’s job to put the performer in the sweet spot. It’s the performer’s job to stay in the sweet spot, but unfortunately, they’re not always cooperative in that aspect (but that’s a topic for another day). And don’t forget — different polar patterns have different sweet spots, even with the same mic.

Let’s start with the golden rule — no matter how you position the microphone, ensure that the performer is comfortable. If they’re not comfortable, their performance will suffer, and a great recording of a bad performance won’t do you or them any service. The secret to correct mic positioning is striking an ideal balance between proximity effect-induced thickness and intelligibility. You want to move the performer close to the mic to get the clarity you need, but not so close that they sound muddy. After that, have the performer move around until you get the sound you’re looking for, then mark their position on the floor. Finally, fine-tune the mic’s axis to tailor your high end and minimize plosives.
Use Proper Gain Staging
It doesn’t matter how well you set up your mic, if it’s noisy or distorted, you won’t get the sound you’re striving for. And how do you control this? By proper gain staging. Set your preamp gain too low, you get noise; set it too high, you get distortion. To maximize your sound, you need to accommodate your source’s loudest peaks, but leave enough headroom to avoid clipping. This achieves the best signal-to-noise ratio. Of course, sometimes you’ve got to throw the rules out the window. Intentionally overdriving your preamp for analog saturation is sure to inject your digital recordings with that elusive analog crunch. But if you want to create a pristine-sounding recording, follow the “loudest peaks without clipping” rule described above.
That takes care of your preamp gain, but what about when the signal hits your DAW? Unlike the old days of analog recording, you don’t need to set your levels superhot. There’s nothing to be gained (pun intended) by doing that. By virtue of modern 24-bit digital technology, you can record into your DAW at low levels without introducing unwanted noise. Tweaking your levels so that their peaks are between -12 to -6 below 0dBFS will give you sufficient volume while leaving you plenty of headroom to work with.
Use Quality Mic Stands and a Shockmount
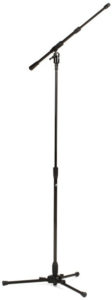 You wouldn’t put your Lamborghini Veneno on a set of cheap tires. That would be an insult to such a fine automobile and would compromise the performance. The same goes for your microphone — using a cheap stand may ultimately lead to disaster. Why is that? First of all, cheap stands are notorious for falling over. Beyond that, they droop and don’t hold their positions very long. There’s no bigger waste of your precious time than constantly repositioning your mic between takes. And it makes you look like a rank amateur. A top-quality mic stand like the Triad-Orbit T2 is an under-appreciated piece of gear that every studio needs.
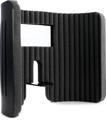
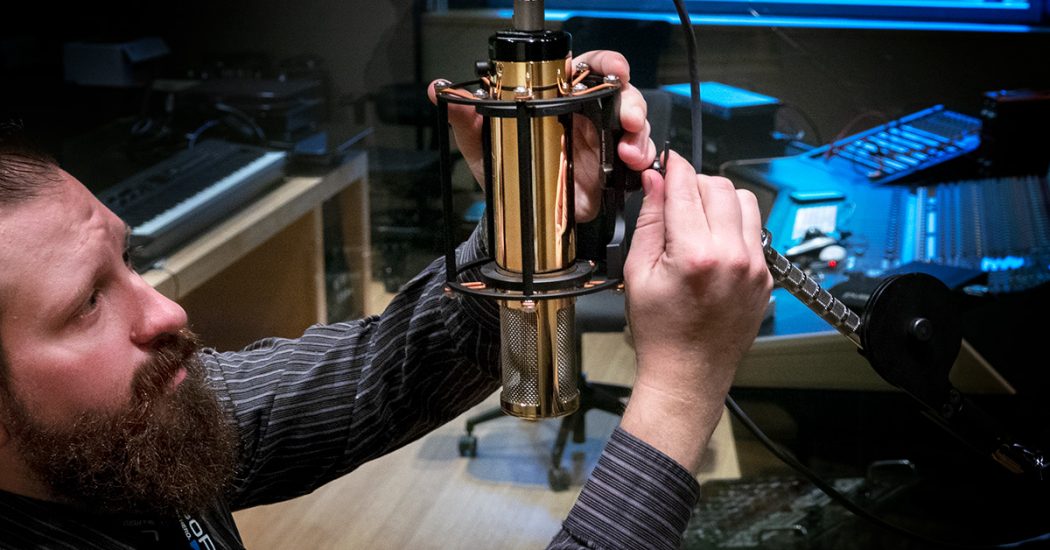
You also need to decouple your mic from the floor. Otherwise, every footstep or player tapping a foot near the stand will create unwanted low-frequency rumble. A quality microphone stand is a start, but what you really need is a shockmount. A shockmount suspends your microphone and isolates it with elastic bands, halting vibrations before they reach the mic. Besides using a shockmount, it also helps to put soft material, such as a mat or rug, under your mic stand. This will further decouple your mic from the floor.
Use Acoustic Treatment
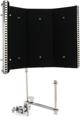
Working in an untreated environment degrades your recording. While balanced treatment of your room is the ideal solution, there is a cost-effective way to improve your vocal recordings with a modest amount of treatment. Start by placing acoustic panels on the wall behind the singer. Auralex Studiofoam Wedgies work great for this purpose, as do wall-mounted vocal booths like the Primacoustic FlexiBooth. Treating the wall behind the singer will greatly reduce the number of reflections that reach the front of your mic (provided it’s in cardioid mode).
Another thing that will clean your sound up even further is a reflection filter like the sE Electronics Reflexion Filter PRO or the Primacoustic VoxGuard VU. These portable devices mount to your mic stand, absorbing and diffusing your room’s reflected sound. Using a reflection filter in concert with the foam described above will give you a sound that approximates a tuned recording space.
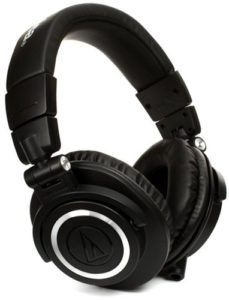
Use Closed-back Headphones
 Another common sonic spoiler is headphone bleed. This issue is magnified if the vocalist is using open-back headphones. This type of headphone is well regarded for its accurate audio reproduction; however, it tends to leak a lot of sound, which then enters the mic. The unwanted sound may seem negligible at first, but after you run the vocal through a compressor, you’ll hear the vocalist’s monitor mix in the vocal track. You get a similar result if the singer removes one side of the headphones so they can hear themselves.
The solution is to provide the vocalist with a quality monitor mix through closed-back headphones like the Audio-Technica ATH-M50x. And if the singer still insists on removing one side of the headphones, be sure to pan the entire mix to the side that they’re listening to.
A great vocalist singing into a quality microphone won’t save your recording if it’s the wrong mic or if you use it improperly. If you’re having trouble figuring out which mic is best for you, give your Sweetwater Sales Engineer a call at (800) 222-4700. We’d love to learn more about your projects and help you get the most out of your new mic!