How to Choose Acoustic Treatment
You’ve handpicked your mics, your preamps, and your monitors, yet you’re still not happy with the sound of your projects. Most likely, you’ve overlooked one of the most crucial aspects of recording: the acoustics of the room. Every sound in your studio will come into contact with a surface and either be absorbed or bounced back. From early reflections to bass modes, the lack of acoustic treatment can really color your recordings, and usually in a bad way. That’s why we’ve put together this acoustic treatment buying guide to explain the basics of improving your space’s sound. Since no two rooms are exactly alike, you can call (800) 222-4700 and talk to a Sweetwater Sales Engineer about customized treatment options for your studio. We’d like to thank our friends at Auralex, the experts on room acoustics, for providing much of the information that follows.
- Do I Really Need Treatment for a Project Studio? “
- Flutter Echo “
- Absorption, Diffusion, and Bass Traps “
- How Much Acoustic Treatment to Use “
- Where to Hang Acoustic Treatment “
- If Soundproofing Is Your Goal “
Project Studios
Do I Really Need Treatment for My Project Studio?
Absolutely! Your project studio was probably not initially designed or tuned to be a comfortable tracking environment. Therefore, affordable acoustic treatment is exactly what you need. Did you know that your room already has a sound all its own? Sound travels and is affected by the path it’s on. It might get reflected and/or absorbed based on a number of factors. The noise in your room is also interacting with other sounds that are traveling in its path, further affecting the sound of the room. All this sound traveling around creates sonic anomalies that did not exist in the original sound. One of the keys to accurately monitoring a recording or to getting good, clean sound is controlling or completely removing the sound of the room. You usually want to hear (and record) only the source, not what’s bouncing off your walls. Acoustic treatment is the best way to ensure that what you’re composing, mixing, and editing is accurate and unaffected by the room you’re sitting in. Even if you want to have a live vibe in your recordings, you’ll still want to have control over the sound. Acoustically treating your room will allow you to control how sound behaves in your studio, giving you the ability to accurately record and monitor your music.
Flutter Echo
Ever clap your hands in a stairwell? That high-pitched, zinging sound is called flutter echo. It’s what happens when two parallel surfaces reflect sound between one another, doubling and redoubling specific waveforms according to the distance between them. The audible effect is in many cases a sort of fluttering sound since the echoes occur in rapid succession. In smaller rooms, it can take on a tube-like, hollow sound as the echoes are closer together. You need a combination of absorption and diffusion to defeat flutter echo.
Absorption, Diffusion, and Bass Traps
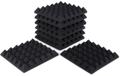
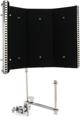
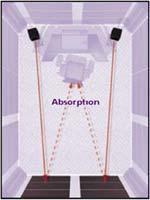
Absorption
Acoustical foam is well suited to alleviate flutter echo and slap. These are the two most common problems in rooms that aren’t designed for music recording and performance. Clap your hands in an open room: the resulting sound is terrible for recording or mixing. Foam is easy to work with, simple to trim to size, and cost-effective. It will help improve the sound picked up by your microphones and give you a more accurate monitoring environment. This ensures that your recordings will sound better wherever they’re played. In a monitoring environment, foam allows you to hear recorded works the way the artist intended, without your room detrimentally modifying the sound.
Shop for Absorption Products “
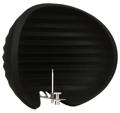
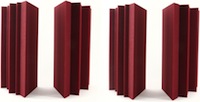
Diffusion
Diffusion prevents sound waves from amassing, so there are few to no hot spots in a room. It disrupts standing waves and flutter echoes, without removing acoustic energy from the space or changing the frequency content of the sound. Diffusion can make a small space seem large and a large space seem even larger. The proper balance of diffusive and absorptive surfaces varies with room size, function, and desired results.
Shop for Diffusion Products “

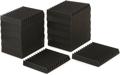
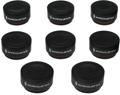
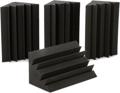
Bass Traps
Low-frequency sound waves are so long (and powerful) that they are the toughest to control. This is true whether you’re attempting to block their transmission to a neighboring space or absorb them to clean up the low-frequency response within a room. What’s more, low frequencies tend to collect in corners and cause problems, such as boosting the apparent amount of bass in the room. Therefore, corner bass trapping is vital to smoothing out any room’s sound.
Shop for Bass Traps “
How Much Acoustic Treatment to Use
Most rooms usually fall in the 25% to 75% coverage range. This is only for walls and ceilings; it largely depends on the room’s design, your intentions for the room, and even your style of music or content. We checked in with Auralex, and they suggest the following generalizations:
- Control rooms for rock, pop, rap, hip-hop, R&B, country, techno, and MIDI music usually benefit from 50% to 75% coverage and mostly absorption.
- Control rooms for jazz, art (classical), choral, acoustic, world, and other forms of ensemble music usually benefit from 35% to 50% coverage. However, the control room should be more dead than the main recording room. Diffusion is used more generously in these types of control rooms.
- Live rooms vary a lot. Some well-designed live rooms can get by with 20% coverage (or even less!). However, most fall into the 25% to 50% range. This is usually a healthy mix of absorption and diffusion. The most successful live rooms usually have some degree of variability.
- Isolation booths usually call for 75% absorption or more.
Would you like some help figuring out how much acoustic treatment you should place in your room? Auralex and Sweetwater offer a free Personalized Room Analysis Form that you can fill out to receive a recommended layout of treatments that will help you handle your room.
Get Full Details Here “
Where to Hang Acoustic Treatment
Determining where to hang your treatment is both an art and a science. It’s based on your goals, room function, and room design. Treatment placement is your call, but keep in mind that once bad room sound is on tape, you can never get rid of it. Here are some pointers to help walk you through the process of hanging your acoustic treatment.
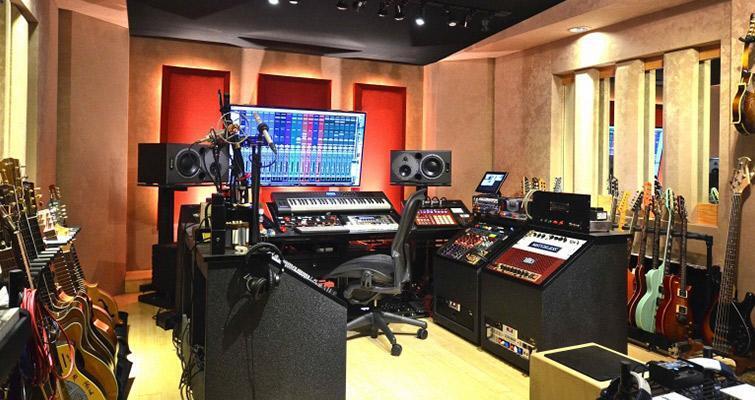
Mixing Area
Many studio designers claim that the front of the room (walls and ceiling) should be treated with absorption of some sort, perhaps as far back as the engineer. The ceiling from the engineer back can contain a mix of diffusion and absorption. However, other designers feel that the rear wall should feature a diffuser array surrounded by broad-bandwidth absorption. The sidewalls from the engineer’s position on back can be alternately absorptive and diffusive. If your budget is limited, then the treatment around your mixing area should take priority over the rest of the room. This will give you a tight, controlled listening area.
Recording Area
If you’re building an isolation booth or a tracking area, consider a completely absorptive environment, starting from the top of the wall down to about knee-height or lower. This will allow you to control sonic variables of the recording in the mix by adding reverb, EQ, and more. However, it’s subjective. Some performers feel trapped by a booth that is completely dead, so you might consider adding some diffusion.
If Soundproofing Is Your Goal
One of the biggest concepts to understand and appreciate is that acoustic foam and diffusors aren’t going to soundproof your room. These are extremely effective treatments for ambient and reflected sound and help make rooms sound better. But they really don’t provide enough sound-isolating properties to keep sound in or out of a room.
Good sound isolation results from two main details: density and air gaps. Density comes in the form of materials such as drywall, chipboard, plywood, soundboard, vinyl barrier products (such as SheetBlok), lead, and more. Air gaps between existing and new walls should, if possible, be at least two inches wide. The combination of density and air gaps will result in isolation; the amount depends mostly on the quality of the workmanship. In a pinch, SheetBlok sandwiched between two layers of drywall offers an amazing amount of density. This alone won’t completely soundproof a room. In rooms not designed for recording, “floating” via a separate floor system and double walls (thus creating necessary air gaps and decoupling) is is an expensive proposition, but the SheetBlok sandwich might be a functional possibility.
Want help finding the right acoustic treatment? Call your Sweetwater Sales Engineer at (800) 222-4700!